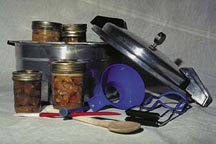
It bakes bread, makes hearty soups, distills water, and holds the kids’ “critters.” Who could ask for more?
Long, long ago in another lifetime far, far away – well, 17 years ago in Montana when sailing hadn’t infected our lives – we received a 6-quart pressure cooker as a wedding present. I remember staring at it and wondering if it would become an enemy or a friend. Memories of steaming pork chops, potatoes, and sauerkraut fresh from my mother’s pressure cooker gave me hope.
My mother had a friendly pressure cooker. She used it weekly to speed-cook dinners for our large family. In fact, when microwaves first came onto the market, she didn’t see any reason to get one. “Why microwave when I can pressure cook?” she’d say.
Now that I had my own, everything seemed different. I listened to my friends’ stories of boiling hot soup splattered on the ceiling and steam burns. Were some pressure cookers enemies to humankind? I went to my mother for help and learned that pressure cookers are safe and easy to use as long as you follow a few basic rules.
Mom’s safety rules
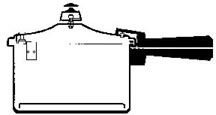
- Always check the vent for debris before using and while cleaning after use. Hold the lid up to the light and look through the vent tube to be sure there are no clogs.
- Always check your gasket to assure that it is pliable and free of any cuts or degradation. If it takes a long time to reach pressure or if steam escapes during pressure cooking, you need to replace your gasket.
- Never interrupt the pressure cooker while it cools and releases pressure on its own. It is cheating and dangerous to jiggle the jiggle-top to speed up release. (But, if no one sees you jiggle it a tiny bit, does that count?)
- Always open the top away from your face. No matter how badly you want to see your creation, you have to wait for the remaining steam to escape.
- Never overfill your pressure cooker. When cooking rice and dried vegetables, fill only to the half-full mark. With stews, soups, and other dishes, fill only 2/3-full. Overfilling a pressure cooker can cause food to clog the vent tube when the food expands or boils, especially with beans.
- Do not pressure cook cranberries, lima beans, applesauce, cereals, or noodles in jiggle-top pressure cookers. These foods tend to foam, and sputter which could clog the vent pipe.
Her guidelines were straightforward and simple. But my pressure cooker and I didn’t develop a very strong relationship. In fact, for years I hesitated to use it. I only grudgingly brought it from the cupboard when my husband, Chuck, requested a favorite pressure-cooked dinner. “Why pressure cook when I can microwave?” I said.
Then sailing came into our lives. The microwave wouldn’t work aboard our new (to us) 30-foot sailboat. We spent weekends sailing, fishing, and crabbing in the Puget Sound area. Now with two kids who were starving after a full day of fresh air and boating, we needed hearty meals fast. My pressure cooker got dusted off and brought aboard to live. That’s when the friendship began. Slowly I began to understand my pressure cooker’s versatility.
When we set off to cruise, this new friend became a necessity. Its locking lid prevented any boiling hot food from splattering when we were cooking under way in a rolly sea. In the tropics, it baked bread with less energy than our oven would have used. In Alaska, it made quick hearty soups in less than a half hour that tasted as though they had cooked all day.
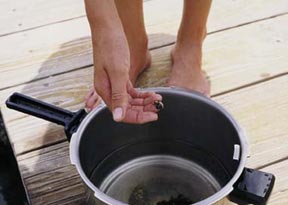
It cleans up easily after being used as a bucket for holding critters the kids have caught. Set up as a distiller, it has the potential to save our lives if we need it to make drinkable water at sea. Top that with the fact that it requires only a little maintenance, and that makes it a great addition to our crew list.
Maintenance tips
When bringing your pressure cooker up to pressure, instead of using high heat, turn the burner to between high and medium high. This prevents warping the bottom. It may take a little longer for it to reach the proper pressure, but it will extend the life of your pressure cooker.
Store your pressure cooker with the lid nestled upside dow n and over the top of the pot. Keep the gasket out of the lid to prolong its life by letting air get to all edges. Storing it this way will prevent warping of the gasket, release odors that may linger, and allow air to get to all parts. To save room, you may be able to nest spare bowls or bottles inside along with your rack and pressure regulator.

Hold the lid to the light to see if you can see through the vent pipe. If not, use a pipe cleaner, twist tie, toothpick, or other thin object to clear it.
While gaskets don’t need to be replaced very often, it is a good idea to carry a replacement gasket and pressure-release plug on extended trips. We have experimented with different gasket materials from auto supply stores but have been unable to find any satisfactory materials. (Note: not all gasket materials are safe for foods.) If you decide to experiment with other types of gasket material, test your experimental gasket with a few cups of water inside your pressure cooker. Bring your cooker up to pressure and maintain it for 15 minutes before you try cooking a dinner. Needless to say, you’d have a big mess if the gasket didn’t work with dinner inside.
Don’t forget to check your pressure release plug whenever you check your gasket for wear. This is the plug that will release steam and built-up pressure if your vent pipe becomes clogged. It is usually made of the same rubber as your gasket and may need to be replaced at the same time. Ours is located on the inside of the lid near the handle.
A little vegetable oil occasionally on your gasket will keep it pliable and soft longer. But be careful: too much oil will actually reduce the gasket’s ability to form a good seal. (Note: check the owner’s manual for your cooker, some discourage the use of oil on gaskets.)
Check your pressure cooker for screws that will rust in a marine environment and replace them with stainless screws before bringing it aboard. Our pressure cooker had two screws in the main handle and one on the helper handle that needed replacing with stainless screws. If your pressure cooker is aluminum, consider putting a barrier of silicone or other material between the stainless screws and the aluminum of the pot to reduce the corrosion that can occur when these two metals join in marine conditions.
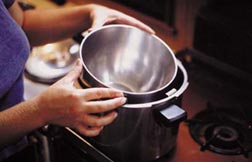
Theresa uses a medium-sized stainless steel bowl as a heatproof dish which fits inside the pressure cooker and is called for by some recipes. A ceramic soufflé dish also works for recipes of this nature.
How it works
The concept behind pressure cookers is simple. When liquids come to a boil, they give off steam. Because a pressure cooker has a locking lid, that steam builds up and creates a higher pressure inside the pot. With the pressure regulator jiggling atop your cooker, it releases small amounts of steam to maintain the proper amount of pressure for the system. That amount is usually 15 pounds of pressure for most brands and models – others have adjustable pressure regulators, and some use lower pressure. With that higher pressure, a higher temperature can be realized.
Under normal sealevel conditions, the water in food can only reach boiling point temperature to cook – that’s 212F. At 15 pounds of pressure, that same water can reach and maintain temperatures of 250F. Thus, food cooks faster.
Inside the pressure cooker, there is also an almost airless environment. The quickness in cooking combined with that environment allows food to maintain its nutrition value without water-soluble vitamins and minerals boiling away. It also allows for stronger flavors to develop, allowing cooks to use smaller amounts of salt and spices.
The rack
Most pressure cookers come with a rack that can be very helpful when cooking rice, vegetables, meats, breads, puddings, or even cheesecakes. Its job is to keep food off the bottom of the pan and away from the intensity of the flame. This is especially helpful during steaming and baking. Vegetables and rice can be quickly steamed in a separate heatproof dish that will fit inside your pressure cooker set atop the rack. The rack is also helpful when baking breads or puddings in a separate dish. And it helps prevent scorching when cooking roasts and other larger pieces of meats that can sit directly on the rack.

Daughter, Amie, gives the family dog a bath in the pressure cooker.
Considerations when buying
Deep-pressure pans can be used both for water-bath and pressure canning. It’s good to have a large pot aboard for cooking large amounts of food wi thout pressure as well. Heavier models with thick bottoms will scorch food less easily and serve better as ovens. Two handles are a necessity when it comes to carrying a full pot of steaming hot food.
Aluminum is lighter in weight and conducts heat better than stainless steel, but some people may want to limit their exposure to aluminum due to possible links to Alzheimer’s disease. If this concerns you, you may want to do your own research on the subject.
A new generation of pressure cookers has come on the market in the last few years that may be safer for boaters though more expensive (some brands are in the $150-$200 range). Instead of the weighted jiggle-top regulator, they use a spring valve that allows for more precise timing and pressurization. The new non-jiggle-top cookers also have a way to release pressure without any need to carry them to a sink or bucket of cold water to reduce pressure (though this feature cannot be used with any foods that foam). Also, since they have a spring valve that is self-cleaning and nearly impossible to get clogged, it is safe to cook the forbidden foods like cranberries, applesauce, lima beans, and cereals.
Great emergency rescues
As any good friend would, your pressure cooker is able to help out in any number of “emergencies.”
-
- Saving your food when the fridge dies – A pressure cooker can become a water-bath canner or pressure canner if food is in danger of spoiling. We like to bring along pint canning jars with lids whenever we leave on an extended trip. Our 6-quart cooker can hold three regular-sized pint jars for water bath canning and pressure canning. Even though we have no fridge, we have the ability to can extra fish and produce, and to make jams or pickles if we arrive in an area rich in produce. To turn your cooker into a canner, experiment with different sizes of canning jars. For water-bath canning, the water level needs to be an inch above the jars while boiling to insure proper immersion.Water-bath canning is used for most fruits and all types of pickles. Pressure is not used for this type of canning. There are many books available that have excellent canning recipes. One I would recommend is Putting Food By by Janet Groene.Pressure canning is used for all non-acidic foods. It can be done easily with your pressure cooker, but you are limited to only one pressure setting. For this reason you will need to refer to your owner’s manual for recipes, times, and proper procedures. Other recipe books may not have the proper times for the amount of pressure that you would be using.
- Storing leftovers – You have just finished a wonderful dinner of soup or stew, but there are leftovers. What do you do with those leftovers if you have no fridge? Well, when we have leftovers from our pressure cooking, I bring the food back up to pressure in my cooker and heat at full pressure for two minutes. Then I set the cooker aside with its regulator undisturbed and lid locked. I leave it for tomorrow’s lunch or dinner. Many times we have kept leftovers for up to 24 hours this way.I use my pressure cooker for any leftover meat as well. That same evening, I simply bring out my pressure cooker and make a quick soup of the meat with any vegetables I have around. After the soup cooks under pressure, I set it aside on my stovetop and leave it for tomorrow’s lunch or dinner.In both cases, I let the pressure cooker cool on its own. I do not break the seal by opening the lid or removing the regulator. And, it is always served within 24 hours. The only drawback to this method is that you cannot use it for dishes that have tomatoes as one of the ingredients. These rules are very important to the safety and healthfulness of the leftover food.
- Turning your pressure cooker into a distiller for emergency drinking water – See below for more information on distillation using a pressure cooker.
- When running low on stove fuel – With a pressure cooker’s locking lid, it can become an ideal fire-less cooking pot. Fire-less cooking is a method of slow cooking that has been around long before slow-cookers were invented. All sorts of one-pot dishes like stews, chili, soups, even rice and noodle dishes can be made with only a little amount of heating and some blankets and pillows. Here are some basic instructions:In the morning, bring your dinner up to pressure and heat for five minutes at full pressure. Take from heat and wrap your pot, upright, in a blanket or sleeping bag, being careful not to burn yourself or disrupt the jiggle-top or pressure safety valve. I place my hand on the regulator as I put the first wrap on the cooker to make sure I do not disrupt it. Pile pillows all around the pot (including underneath), and then wrap any other blankets or sleeping bags you may have aboard around your cooker. Try to insulate your cooker so that minimal heat is released. Wedge this huge bundle somewhere safe while you are sailing. In 8-10 hours you’ll have a steaming dinner all ready for eating. Aboard Lindsay Christine we use two sleeping bags and all four of our family pillows. One of the kids’ berths, depending on the tack, is the ideal wedging place for our fire-less cooking bundle.By the way, using this method with dried vegetables such as beans still requires a pre-soak before preparation, which would have to be done the night before.
- A weapon – As a safe weapon aboard a boat, pressure cookers are second only to a large cast iron frying pan. It will never be confiscated when entering a new country, you don’t have to reload, and even a child can use it.
- An extra bucket – Buckets are usually stored outside near the cockpit of most boats. But, when stored inside the galley of your boat, a pressure cooker may be closer at hand if water enters your cabin while you are below. A pressure cooker is a perfect bailer with two handles for carrying heavy loads of water.
- During a medical emergency – While pressure cookers are nowhere near as effective as an autoclave in a hospital or lab, they do work to sterilize items in the same general way providing a higher temperature with an increase in pressure. And they could be your only solution for sterilizing supplies when a medical emergency at sea occurs.Pressure cookers attain 15 pounds of pressure and 250F, the very minimum requirement to sterilize medical equipment, water, and bandages or cloths. If a medical emergency were to occur, you could sterilize your supplies by putting them into a heatproof dish fitted inside the pressure cooker with 2 cups of water in the bottom and the rack in place. Water could be sterilized inside canning jars filled with 1 inch of air space remaining and sealed with lid and ring. The minimum amount of time at full pressure (I would have the jiggle-top regulator rocking at a consistent speed because I wouldn’t be worried about overcooking anything) would be 20 minutes. But this is not a guaranteed procedure. There is no way to assure that everything received enough steam and heat under pressure to say that all supplies are sterile. However, as an alternative to boiling supplies in water, it is a superior method because everything reaches a higher temperature. This is in no way condoning the use of a pressure cooker as a substitute autoclave on a regular basis. But it is a possible alternative in an emergency situation when someone is far away from medical services.
Aboard Lindsay Christine, we try to make most of our items aboard have a dual purpose. Our pressure cooker has more than satisfied that requirement. Here’s a list of the ways we have used ours: pressure cooker, non-pressurized cooking pot, distiller, slow cooker, steamer, oven, canner, bucket, weapon, temporary leftover storage unit, temporary critter home, weight training equipment, sterilizer.
Could a microwave do that? I doubt it. These days I agree with my mom more and more. I say, “Why microwave when I can pressure cook?”
Making a distiller
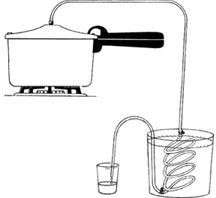
After some experimentation, our pressure cooker has become a successful distiller with the addition of these items:
- 10-feet of 1/4-inch outside diameter copper tubing
- two 3-foot lengths of 3/8-inch outside diameter (1/4-inch inside diameter) food-grade vinyl tubing
- two hose clamps
- a bucket
- a water container
How we put the distiller together and run it:
First, we fill the bucket with cool seawater and bring it below to our galley. Then we fill our pressure cooker 2/3 full with seawater or any other water that may or may not be contaminated. Our copper tubing is wound into a coil around something cylindrical so it will fit completely into the bucket of cool seawater with one end pointed up toward the pressure cooker on the stove.
Our pressure cooker has a vent pipe with an outside diameter of 1/4-inch. We slide one of the 3-foot lengths of food-grade vinyl all the way onto the vent pipe in the lid. Then with a hose clamp over the vinyl tubing, we slide the copper tubing into the remaining loose end and tighten the clamp. The remaining piece of food-grade vinyl tubing attaches to the copper tubing end at the bottom of the bucket with a hose clamp as well. Then the remaining end of vinyl tubing is placed inside the water container, which sits next to the bucket. It helps if your container is shorter than your bucket.
Now we are ready to assemble the pressure cooker and heat the seawater. As steam builds up inside the cooker, it begins to make its way through the tubing. When it reaches the copper coils, it condenses into pure water and flows into the water container. The key to making this distiller run efficiently is to replace the seawater in the bucket once it warms up. Be careful not to burn yourself when you lift the coil out of the bucket to change the water. As the flow develops, we turn the burner to medium low because less heat is required. Once the steam begins going through the tubing, we usually get about 1 cup of water after about 25 minutes on medium heat.
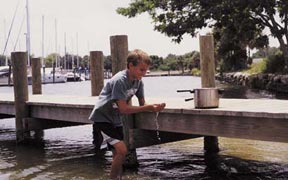
Son, Alex, uses the pressure cooker as an occasional aquarium.
Keeping the copper tubing in a coil with the vinyl tubing already attached helps with storing and quick assembly. Before using the tubing for the first time, rinse it with clean water. Be sure to use only food-grade tubing, as not all vinyl tubing is safe for drinking water use. We have never found the vinyl tubing to pop off the vent pipe or melt with the heat. The pressure that builds up is not the same because of the lack of the weighted regulator on the vent pipe, so the temperature is not as high either.
While this process is slow and uses quite a bit of energy, it could save your life in an emergency. In many situations you could use this process to create pure water. Water tanks can run dry or become contaminated. Or you may be somewhere which only has contaminated water available. You may also need distilled water for your boat’s batteries.
Recipes
Chicken and Mushrooms
This one-pot dish requires few ingredients.
- 2 chicken breasts, skinned, boned, and cut into large chunks
- 1 cup thickly sliced mushrooms
- 1/2 onion, sliced
- 1 bell pepper, cut into chunks
- 1/4 cup low-sodium soy sauce
- 1 cup water
- 1 tablespoon brown sugar
- 1/2 teaspoon garlic powder
- 1 cup rice (I use a mixture of 1/2 long-grain white and 1/2 brown rice)
- 1 1/2 cups water (pressure cookers use less water than would be normal with conventional cooking)
Place first eight ingredients in cooker. Place rice and water in a heatproof dish that fits loosely inside your pressure cooker. Place dish in pressure cooker with chicken mixture surrounding it. The dish should stick up a few inches above the level of the chicken mixture. No food or containers should be over 2/3 full. Close securely. Place pressure regulator on vent pipe and cook 10 minutes with pressure regulator rocking slowly. Let pressure drop. Lift out rice bowl, and let sit 5 minutes. Thicken chicken dish, if desired, with cornstarch mixed with a little water. Serve over cooked rice. Serves 4.
Rice can be cooked separately in the pressure cooker by combining 1 cup rice and 1 1/2 cups water in a heatproof dish. Place dish inside the pressure cooker with 1 cup water in the bottom. Pressure cook 10 minutes if using 1/2 white and 1/2 brown rice, 5 minutes if using white rice only. Let pressure drop. Open lid and let rice sit 5 minutes. Fluff with fork.
Sun-dried Tomato/Herb Bread
This bread is an example of steam-baking in the pressure cooker. It is done under pressure. The amount of time for steam-baking is a bit shorter than when using an oven, and you save fuel by heating only the pressure cooker.
Pre-heat the pressure cooker on medium heat five minutes before putting in your food to be baked, covered with aluminum foil to retain heat. Turn your burner down very low. A consistent low flame will produce a moderate oven temperature. Cakes and other sweets seem to take a little longer than breads this way.
We love this bread sliced and toasted under the broiler with cheese melted on top. The crust is chewy and not browned on top. You can make plain bread this way by leaving out the seasonings. I like to use 1/2 whole wheat to hide the fact that the bread is not browned on top.
- 1 cup warm water (110-115 F)
- 1 1/2 teaspoons active dry yeast
- 1/2 teaspoon salt
- 2 tablespoons olive oil
- About 3 1/2 cups unbleached bread flour
- 1 cup fresh basil, chopped finely
- 4 cloves garlic, minced
- 6 reconstituted dry-packed sun-dried tomatoes, chopped
- 1/4 cup shredded Parmesan cheese
Dissolve yeast and sugar in small bowl with 1/4 cup of the warm water. Add remaining water to large mixing bowl. Add salt and oil and allow to cool while yeast is dissolving. Add yeast mixture and 3 cups of flour along with basil, garlic, dried tomatoes, and cheese. Turn out on floured counter and knead for 10 minutes or until smooth and elastic, adding flour as needed. Place dough in a greased 2-quart oven-safe casserole dish or bowl that will fit in your pressure cooker. Let rise until doubled in volume in a warm draft-free place 40 minutes to 1 hour. When doubled, punch down, turn out onto counter, and knead a few times. Place dough back in dish and let rise a second time for 1/2 hour.
Pour 2 cups fresh or salt water into pressure cooker with rack. Place container of dough in the pressure cooker and seal with lid. Bring up to 15 pounds pressure. Turn heat down to maintain pressure, and cook 40 minutes. Cool cooker immediately by placing in a pan of cold water or letting cold water run over cooker. Open lid carefully and remove bread. Cool in baking container for 10 minutes, then invert and take out of dish. Cool 15 minutes before slicing. Makes 1 loaf.
Mercator Brownies
This is an example of baking with a pressure cooker. To bake in the pressure cooker, remove the gasket, leave the pressure regulator off the top, and use the cooking rack and a separate heatproof dish that fits inside the cooker for the food. Doubling the recipe and baking it in an oven will produce a 13×9 pan of brownies. It is a scaled-down recipe tailored to using my medium stainless steel bowl (that holds 6 cups) as a baking pan. A soufflé dish would work well as a heatproof dish.
- 2 ounces unsweetened baking chocolate
- 3 tablespoons butter
- 3/4 cup brown sugar
- 1 egg
- 3/4 teaspoon vanilla extract
- 1/2 cup unbleached flour
- 1/2 cup nuts (optional)
Pre-heat pressure cooker over a medium flame with rack inside and top locked on but without a gasket or the pressure regulator. Do not put liquid inside. Lightly grease the heatproof dish that will fit inside your pressure cooker for the batter.
In a pot over very low heat, melt chocolate and butter, stirring constantly. As soon as it’s melted and smooth, remove from heat and add sugar. Stir until well blended. Add egg and vanilla; mix well. Add flour and nuts, if desired. Stir mixture well. Pour into heatproof bowl. Cover with aluminum foil. Open your pressure cooker and place dish inside on rack. Turn heat down to low and bake 45 minutes or until a wooden toothpick inserted in the center comes out clean. Remove from pressure cooker and cool. Enjoy!
Cooking Dried Vegetables
The pressure cooker is ideal for cooked dried beans, peas, and lentils. Remember to fill the cooker only halfway.
Pre-soaking dried vegetables
- 2 cups dried vegetables
- 2 teaspoons salt
- 1/4 cup cooking oil
- Water to cover vegetables
Place dried vegetables in cooker. Add remaining ingredients and soak 8 hours. I start soaking beans in the morning in our cooker, keeping it secured with fiddles on the stovetop.
Cooking pre-soaked vegetables Pour off and discard water from soaking. (This water could cause indigestion.) Place vegetables in cooker, adding enough water to cover well. Add seasonings and any other additions you desire. Adding 1 tablespoon cooking oil will decrease the foaming action of the vegetables.
Do not fill the cooker over half-full. Close cover securely. Place pressure regulator on vent pipe and cook under pressure according to the following timetable. Let pressure drop.
| Dried vegetable Pinto beans Black beans Great northern beans Kidney beans Navy beans Pink beans Black-eyed peas |
Cooking time 25 minutes 35 minutes 20 minutes 25 minutes 30 minutes 30 minutes 20 minutes |
Article from Good Old Boat magazine, November/December 1999. This and other cooking aboard articles are also available in the Good Old Boat Galley Book CD.


