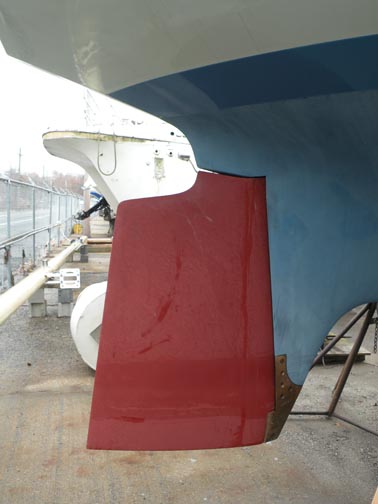
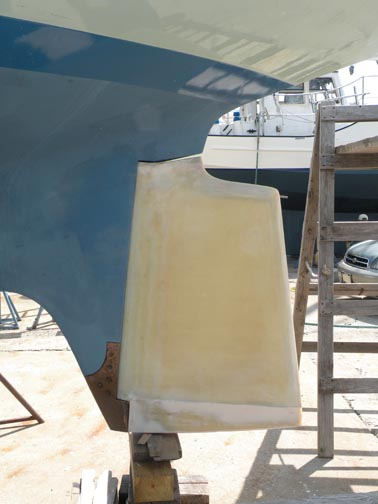
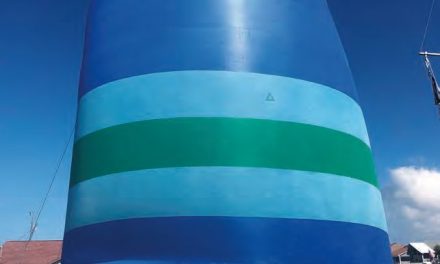
After all the setbacks we’d experienced during Levity’s 10-year repair and refit, it was a great relief when the redesigned and newly built rudder was fitted on her stern. At last, another major project on our cruising boat was nearing completion. The sculpted shape of the rudder was visually appealing and we marveled at how lovely Levity’s underbody looked once it was attached. All too soon, it was time to unship the rudder and drag it back to the shop to keep it out of the sun and so I could attend to a few areas that needed finessing. Ultraviolet light degrades epoxy, which must be painted for best long-term durability, so the rudder would have to be stored indoors for the time being.
We’d learned many lessons throughout the Levity Project and the rudder, in particular, taught more than its share about the consequences of poor communication. The ability to clearly convey information is critical when others are supplying labor, raw materials, or finished parts. I would have saved myself some time and aggravation had I made certain it was clear that the flags welded on the rudder stock should align exactly with its fore-and-aft centerline. This does not necessarily mean that a rudder stock ordered as a complete unit would have been perfect either, since I had not thought to specify this on the plans. I should have spelled out these details during each step of the process. There’s not much to add about the stock being too long in the first place. This mistake, which could have been avoided, led to a series of costly errors in the machining of the rudder stock.
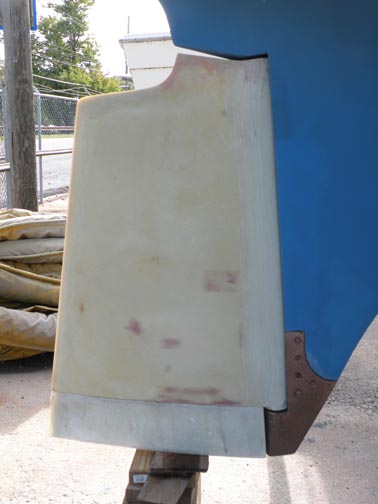
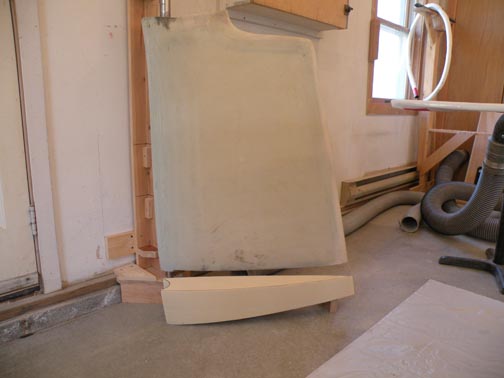
Almost finished, Levity’s rudder would be going back to the shop for the winter. The original plan was to fill minor surface imperfections and taper the foot to take into account the rake of the rudder stock.
Laminate questions
There were more lessons to be learned from the rudder project. Several days after the rudder was completed, I stripped the release fabric off the rudder body. At first everything looked fine. The release fabric left behind a nicely textured surface that would allow me to add more fiberglass cloth or fairing compound, if needed, without any additional surface preparation. After checking the rudder shape with my templates, I concluded that everything was within tolerance and the surface was ready for fine-tuning with the longboard and other hand tools.
When I began sanding the surface however, I noticed small glossy dots in several places. As I continued sanding, these glossy spots disappeared but other spots simultaneously appeared elsewhere. As an experiment, I sanded through a couple of layers of cloth over a small area. The disappearance and re-emergence of the glossy areas continued. In hindsight, what I was looking at was obvious but, at the time, I did not understand why this was happening, because each tiny spot appeared to be limited to one individual cross-over of cloth weave.
Resin drain
I became concerned enough to call Joe Merton, of Merton’s Fiberglass, for advice. Joe is one of my most trusted mentors on fiberglass construction. After listening to my description of the mysterious glossy spots, he said it sounded suspiciously like a condition he referred to as “resin drain.” The appearance of spots indicated that resin had drained out of the weave of the cloth in some areas. They appeared wherever one crossover of the cloth lost enough resin to create a small air pocket. Technically, each spot represented a failure in the laminate.
Mary and I had gained most of our fiberglass experience when we repaired Levity’s hull-to-deck joint. Most of this repair had been completed using epoxy in the horizontal plane. Constructing Levity’s rudder meant working with epoxy in the vertical plane, a first for us.
One of the most important ways in which epoxy and polyester resins differ is how well they stay in place on vertical surfaces while being worked. Polyester resins are thixotropic, meaning they tend to cling to vertical surfaces while they cure, so the resin and glass fabric work together to stay put. Epoxy resins do not cling well to vertical surfaces and, when they heat up as a result of the exotherm (the heat that’s released in the curing process), they become even less viscous and more likely to give in to gravity. As a result, cloth higher up on vertical surfaces may become resin starved.
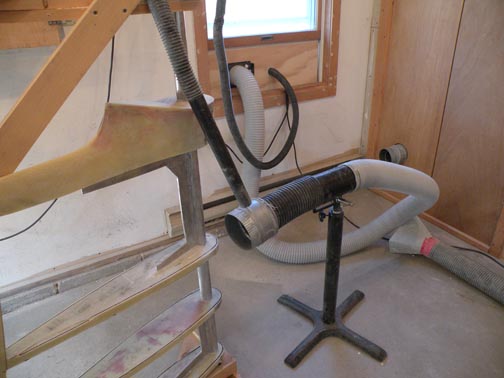
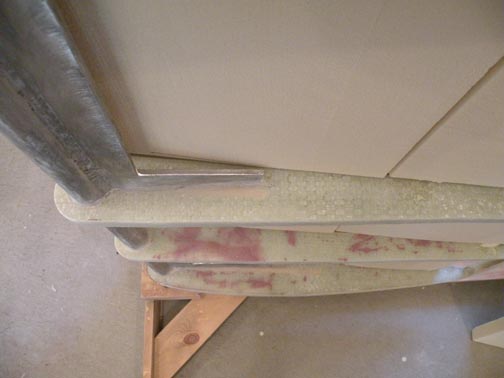
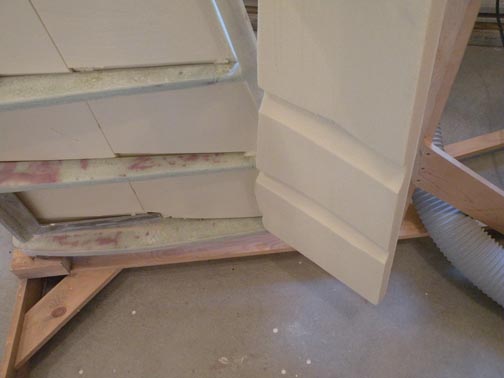
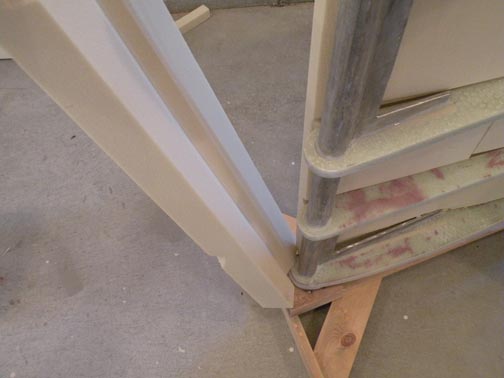
Once he’d cut the skin and filler foam from between the frames, Stephen marked the frames where material had to be removed to allow 1/8th-inch-thick skin on the rebuilt rudder.
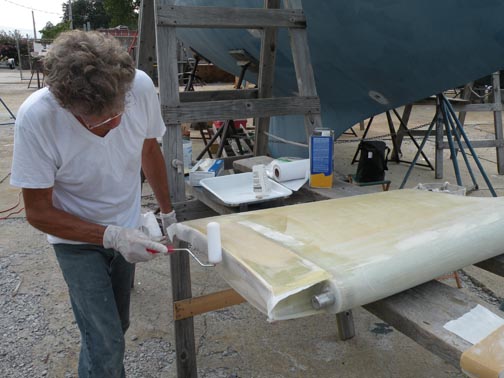
To avoid this, the resin must be continually rolled upward while additional resin is added to keep the cloth properly wetted out. This process should continue until just before the resin becomes tacky, at which point the resin is starting to cure and will not sag or run further. Care must be taken to avoid over-rolling, as this causes the cloth and resin combination to stick to the roller and pull away or stipple the resin.
In Joe’s opinion, the amount of resin drain I described would not compromise the integrity of the laminate because of the inherent strength of epoxy construction. I was not entirely convinced, but Levity needed other repairs before the rudder could be installed. With winter coming, those projects took precedence while I still had a weather window. After re-glassing the areas of the rudder that had been exposed, I hung it back on the skeg so I could snap a few pictures and imagine how Levity would look once her new rudder was permanently installed.
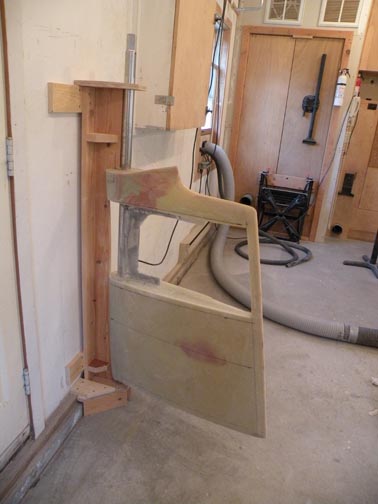
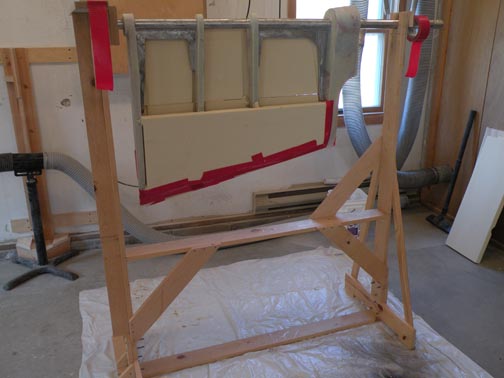
I took the rudder back to the shop and placed it on the bracket I’d used throughout the design and building process. It would remain there until spring, when I planned to reinstall the entire steering system. It was now the beginning of December. Even though suitable weather for outdoor boatyard work was coming to an end, there were many projects to do in the shop. Whenever I glanced at the rudder in its prominent place on the rear wall, I was reminded of the lessons I’d learned and the twists and turns along the way to completing it.
“Good enough” is not good enough
One requirement in the restoration of Levity was the need to do a good job . . . not just “good enough” but “good.” Somewhere along the line, I had unintentionally interpreted that to mean a perfect job. My decades of work as a carpenter and cabinetmaker taught me to be precise and I applied that precision zealously to repair work on Levity. We were probably about one year into the Levity Project when I realized that perfection is only obtainable in a perfect world. Moreover, although Mary and I love our project boat, we knew she was not perfect and most likely didn’t start out perfect either. We decided that striving for excellence would have to suffice. In our quest for excellence during the Levity refit, we endured several costly project do-overs, but we both knew when something was not good . . . in other words, when it was just “good enough.”
The issue of good vs. good enough came up repeatedly during the building of the rudder, as one mistake after another piled up. Did all the extra cutting and welding compromise the finished stock? Would the imperfect fiberglass work cause blisters or some unknown failure in the future? Was the added weight caused by the additional glass and resin too much for the rudder? As we pondered these questions, we reasoned that we should listen to the advice of the experts. The last welder to work on the stock had assured us that the modifications had not compromised its strength. My fiberglass mentor seemed confident in the integrity of my fiberglass work. Although I did not meet my target weight, the new rudder was quite a bit lighter than the rudder I replaced and a definite improvement. Our conclusion was to leave well enough alone and move on to the many tasks remaining on Levity’s to-do list.
I busied myself with other projects and put off the final touches on the rudder. When the day to resume work finally arrived, I used the templates I’d made from the original rudder to mark out the areas that required a little more filler or additional shaping. We were now very close to epoxy barrier coating and applying anti-fouling to the rudder. I was still not entirely pleased with the additional weight, but other than that, the rudder seemed fine. I ran my hand over the smooth body of the rudder and finally, with some reluctance, concluded that it was good enough. Wait! Did I really just say “good enough”? According to our philosophy on the entire project, that meant the work was not acceptable.
Arriving at a fix
Months earlier, when I first realized there were problems with the new rudder, I thought about what I had learned during its construction and — since hindsight is 20-20 — what I should have done in the first place. Along with those regrets, I had devised a couple of strategies I could employ to correct those mistakes. The solution to correcting the imperfections in the glass work was straightforward although time-consuming: remove and re-glass the rudder body. Reducing the weight of the rudder was more problematic, as it would involve not only removing all the glass, but also re-working the fiberglass frames to allow for a thinner skin. This meant stripping the rudder down to its steel stock. While it was not quite starting from scratch, it would involve a significant amount of work. When I finally broached the subject with Mary, my wife, first mate, and purveyor of sanity, she replied: “As soon as you mentioned the problems with the new rudder, I knew that you were either going to fix it or do it over again. It was just a matter of time before you figured that out for yourself.”
The next morning, I explained to her how I planned to rebuild the rudder to my original, preferred specs. Since I had identified the two sources of trouble, the reconstruction seemed pretty straightforward. I also had learned quite a bit from all of the fiberglass work I had done and the mistakes I’d made along the way, so I hoped the project would go much more quickly.
The plan shaped up like this:
- Strip the rudder down to its frame leaving intact the top section, which had a complex shape where the rudder met the hull and did not need to be redone.
- Rework the fiberglass frames to reduce weight and allow a thinner skin. Given the overall strength of the frame, I thought a skin of 1/8 inch would suffice.
- Reduce the size of the two intermediate frames to eliminate the hard spots that resulted in extra glass being used, mainly for ease of fairing the body of the rudder.
- Reduce the size of the stainless-steel flags to which the fiberglass frames were attached. I realized I had overbuilt those flags from the beginning.
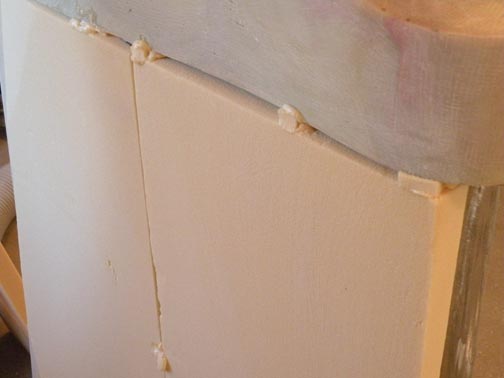
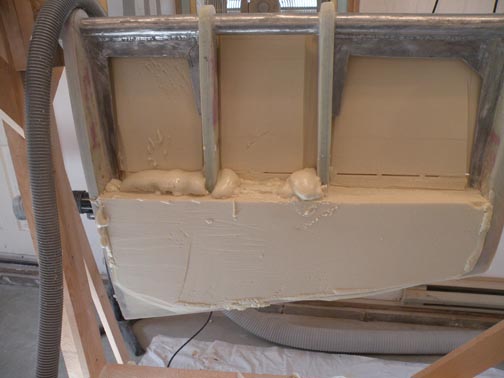
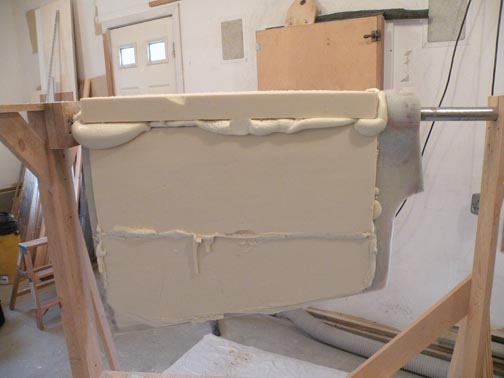
- Attach two skins of 1-inch-thick rigid foam between the top and bottom frames. Fill the void between the skins with pourable foam. For consistency, I chose pourable foam of the same density as the rigid foam skins.
- Cover the rudder body with four layers of 12-ounce biaxial cloth, working carefully to avoid resin drain. According to my calculations, this would yield a skin thickness of about 1/8 to 3/16 inch, enough to minimize the use of fillers.
- Reconstruct the rudder foot to eliminate a few more pounds in weight and accommodate the rake of the rudder post. This time I wanted to shape the part while the main body of the rudder was in place on the boat. The foot would be sized to allow a thinner skin, about 1/16 to 1/8 inch thick, further reducing the weight of the completed rudder. Like the first rudder foot, this version would be attached with epoxy and tabbed in place with lightweight cloth.
The rebuild commences
With this plan in mind, Mary and I suited up in our safety gear and assumed our positions: I stationed myself next to the cutting and grinding tools while Mary handled the dust collectors and vacuums. Within a couple of hours, we removed the fiberglass skin and foam core and were ready for final cleanup of the remaining epoxy from the rudder stock. When I cut off the fiberglass shell, I left the trailing edge spine intact. This provided a sturdy, structural 360-degree frame that defined the outline of the rudder.
The next day, I reworked the fiberglass frames that defined the airfoil shape and cut away sections of the stainless-steel flags. Using cutting and grinding tools, I also removed the residue remaining from my previous work in order to ensure proper bonding of the new foam core.
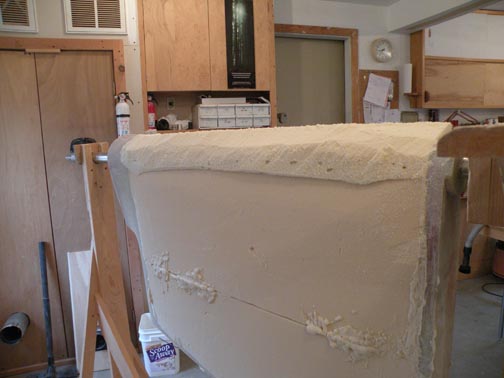
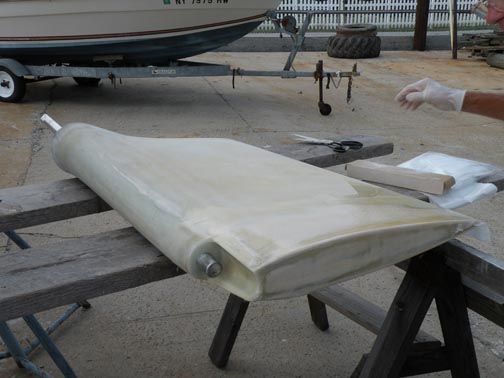
The nicely shaped body was ready for fiberglass. I applied two sealer coats of epoxy resin. While the surface was still slightly tacky, I carefully removed all remaining bumps and minor runs with coarse sandpaper. Immediately afterward, I applied four layers of the 12-ounce cloth to ensure a good chemical bond throughout. At the end of the day, while the glasswork was set up but not yet cured, I checked the rudder’s shape with the four templates. The fit was just about perfect and the rudder was ready for the sacrificial foot to be attached, followed by final fairing and paint. The annoyance of knowing that we had a soggy rudder when we bought Levity so many years ago was finally gone.
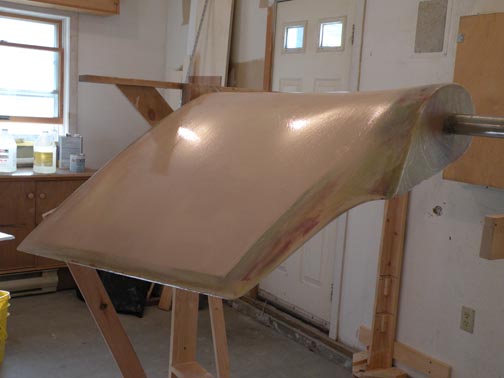
… Stephen sealed the foam body with clean epoxy (no fillers added), then covered it with 4 layers of 12-ounce biaxial cloth.
Reflections
It took a combination of skill, patience, and determination to bring this project to completion. Had everything gone according to plan, my original estimate of 120 hours to construct the rudder would have been reasonably accurate. This does not include fitting, painting, and installing the finished rudder, which consumed several additional days of tedious work. I installed and removed the rudder more times than I could count before the whole system worked precisely. Coincidentally, one of the higher estimates I received to duplicate the existing rudder specified 120 hours of labor.
The time actually spent to complete the first rudder build was closer to 150 hours, proving how easily the unexpected can derail the most careful estimate. The rebuild was completed in an additional 50 hours. This included stripping off the previous work and getting back to the point of fitting it to Levity’s stern. It did not include the original layout and construction of the frames and the top and bottom sections.
The labor estimate also does not include the time I spent trying to correct the rudder stock machining errors. The final materials and machining costs of constructing the rudder stock came to $1,350. This was almost double what it would have been if all the work been done correctly the first time. Material costs for constructing the rudder body, including fiberglass cloth, epoxy resin and the various foams, totaled approximately $600, bringing the total cost of materials for the project to $1,950.
The first part of this story, in which Stephen describes how he built a new rudder for Levity, a Nicholson 35, was published in the July 2014 issue.
Further reading
Desirable and Undesirable Characteristics of Offshore Yachts, by the Technical Committee of the CCA, W.W. Norton and Company, 1987.
Metal Corrosion in Boats, by Nigel Warren, International Marine Publishing 1980.
The Nature of Boats – Insights and Esoterica For The Nautically Obsessed, by Dave Gerr, International Marine, 1992. Chapter 53 “Rudders, Hitting What You Aim For.”
Surveying Small Craft, by Ian Nicholson, Sheridan House 1994. Chapter 9 “Rudders and Their Gear.”
Fiberglass Boats, by Hugo Du Plessis, International Marine 1996.
The Gougeon Brothers on Boat Construction, Gougeon Bros., Inc., 1985.


