


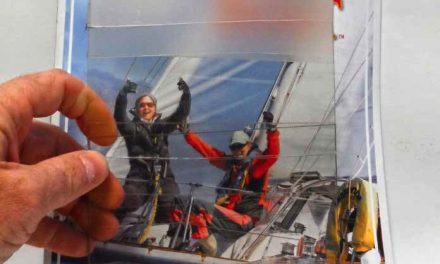
The top-down-furling gennaker powers Hugh’s Viking 33, Hagar, on a reach.
A top-down furler takes the terror out of setting a spinnaker.
Downwind sailing with only a jib or genoa can leave a sailor wanting more. I wanted to fly a spinnaker on Hagar, my Viking 33, but I was intimidated by the 14-foot-long pole and all the lines associated with the symmetrical spinnaker that came with my boat when I purchased her. I didn’t want to deal with whisker poles and gybe preventers, and I wanted to stay off the foredeck, so I sold my symmetrical chute and replaced it with a used gennaker that I could fly from a tacker at the bottom of the sail.
Wow! What a difference that made. But I still wanted to use my gennaker without needing a strong and nimble foredeck crew on board to hoist and retrieve it. That ruled out a dousing sock and led me to learn about furlers used for sails that are set flying, that is, their luffs are not attached to a stay.

Key components of the furler are the torque rope…
In a conventional jib-furling system, the luff of the sail is held in a slot in a foil-shaped aluminum extrusion that fits over and rotates around the stay as the sail is furled or unfurled. As the sail unfurls, the furling line wraps onto a drum fixed to the extrusion.
The luff of a flying sail, such as a gennaker, asymmetric spinnaker, staysail, or Code Zero, is not attached to a stay. When designed to be roller-furled, a flying sail can be made to furl along its own luff, either from the bottom up or from the top down. Both methods employ a cable or “torque rope” around which the sail furls. At the tack, the cable is, in most instances, attached to a drum or furling sheave turned by a continuous line. At the head of the sail, the cable is attached to a swivel, which in turn is attached to the halyard for hoisting.

…and the furling drum.
For bottom-up furling, the cable is sewn into the luff of the sail, the tack is attached directly to the furling drum, and the sail tends to furl from the bottom up because that’s closest to where the torque is applied. For top- down furling, the torque rope attaches to the drum and is separate from the sail, to which it attaches only at the head swivel. The tack of the sail attaches to a floating ring on the drum, so when the drum turns, the torque is transferred to the head of the sail and furling begins at the top.
Bottom-up furling is best suited to sails, like the Code Zero or staysails, that are cut for close reaching to beam reaching. Top-down furling was developed for sails, such as gennakers and asymmetric spinnakers, that are designed for wider wind angles and have more material toward the head and convex luffs.
A key benefit to me of a foil- less or flying-sail furler, as they are also known, is that I could hoist the furled sail at the dock, unfurl and furl it at my leisure without leaving the cockpit, and lower it after returning to the dock. As I already had the gennaker, I started looking for a top-down furler.


Setting up the boat
Foil-less furling systems can be used on nearly any sailboat, but two primary requirements — an attachment point at deck level and a suitable spinnaker halyard at the masthead — might necessitate modifications to some boats. I fitted a deck-mounted retract- able bowsprit to project the tack of the gennaker well forward of the headstay, and I already had two spinnaker halyards at the masthead.
When the sail is hoisted, the swivel at the head needs to be close to the halyard block or sheave. If it’s not hauled all the way up, the halyard will twist a lot before the furler gets going. To prevent this, it’s important to be fussy when measuring for the furler. But if the swivel has to sit lower for some reason, a torsion cable between the halyard and the swivel should keep everything from over-twisting.
One of my dock mates, an Aussie who’d been a professional sailor when he was younger, warned me about how my furler might bind up at the top. In fact, that top swivel is new to the neighborhood up there and can get in the way, particularly on a masthead rig. It’s important to keep the flying-sail halyard, the furler swivel, and the flying- sail headboard clear of the headstay and the top of the jib/genoa furler.
On a 7/8 or 9/10 fractional rig, it’s easy to keep everything clear by running a new halyard (if there isn’t one already there) a little above the headstay. On a masthead rig, the best solution is usually a mast crane that projects the spinnaker halyard well forward of the headstay. If necessary, one can be fairly easily welded or bolted on.
The furling drum needs a robust attachment point far enough forward to get the sail out in front of the headstay. Some people keep it real simple and put a block on the end of the anchor roller. I have seen boats where a steel square bar has been fitted to the foredeck with U-bolts and a block shackled onto the end. Whatever the solution, to ensure many years of carefree sailing, it’s important to take into account that the sail will place quite high loads on the tack fitting.
A foil-less furler can also be used to set a staysail inside the headstay. The head of the sail can be kept clear of the headsail furler with a halyard restrainer/ deflector fitted to the mast below the halyard box. The tack needs a fitting in a place on the foredeck that can be suitably reinforced, perhaps in the vicinity of the forward bulkhead.

Spinnaker halyards on masthead rigs are usually rigged on a crane above the headstay. On a boat that’s not equipped with a spinnaker halyard, a crane can usually be bolted or welded to the masthead.
Tack adjustments
With a foil-less furling system, because the luff is flying free, it’s possible to ease it and let the foot of the sail rise. Easing the luff is usually most advantageous when flying the downwind sails used with a top-down furler.
On a top-down furler, the furling drum is always attached directly to a hard point with a fixed attachment, such as a shackle. The tack of the sail is then attached to a swivel atop the drum. This attachment can be made with a snapshackle, but to gain the advantage of easing the luff, you can attach a block to the swivel and lead a tack line through it and to the cockpit. When unfurling and furling the sail, this tack line must be taut, but while sailing, it can be eased to enhance performance.
On a bottom-up furler, the tack of the sail is attached to a fixed point on the furling drum with a shackle or a snapshackle. But if the drum itself has been attached to the boat using a block and a tack line led aft, it can be eased in the same manner under sail.
The furling line
Most foil-less furlers are driven by a continuous line, rather than a line that wraps and unwraps around a conventional furling drum. This allows a much larger sail to be furled without the need for a very long line and a large drum.

On Hagar, Hugh led the furling line to the cockpit via fairleads on the stanchions.
The furling line is a loop and must be measured to length — from the furling sheave to the cockpit and back — and the two ends spliced together. (Where line guides or blocks, other than snatch blocks, are used to guide the furling line to the cockpit, the line must be threaded through them before it’s spliced.) From the drum, the line is usually run through stanchion-mounted line guides back to the cockpit and then attached to a shock cord to keep it secure. A snapshackle on the shock cord will come in handy, as it will allow the furling line to be moved to the best position for hauling on it when furling and moved out of the way when the boat is sailing.
As with a conventional furler, the furling line must be made fast to prevent the furled sail from unfurling unexpectedly. This can be done with a double “over and under” cleat mounted on a stanchion near the cockpit.
Practicing rolling up the flying sail will build up forearms; there is a lot of sailcloth to wind and unwind, much more than in a genoa.

By leading the furling line through a block on a pendant with a snapshackle, he is able to move its point of attachment.
The cable
A cable, or torque rope, connects the drum at the bottom of the furler to the top swivel. That cable, whose job it is to transfer torque from the drum all the way up to the head of the sail, can be made of any number of materials.
Some cables twist more than others. As a general rule, the more twist in the cable, the more tension needed in the halyard to get the furler to work well. A low-stretch halyard (such as one made of Dyneema) can be winched taut enough to allow the furler to work, and it will not lose that tension during the day. One manufacturer supplies a cable that hardly twists at all under load, and that cable works best when it is snug but not tightened down.

His flying sail tacks to a retractable bowsprit.
Each system has a different way of attaching the cable to the drum and top swivel. This step is simple with a Code Zero or a staysail, where the cable is in the luff of the sail. It gets a bit fussier with a top-down furler because the ends of the cable demand some work, more so with products from some suppliers than others. It’s worth checking these details when choosing a supplier, and it might pay to hire a rigger to do the ropework.
When I installed my top-down furler, I cut everything way too long the first time and did it over a couple of times while the boat was in the water and the rig was up. This was a great help in getting it right. I even modified the setup after sea trials to push the whole rig out a bit farther from the boat’s bow. If I’d not been able to see it live and test it to make sure it worked right, getting the measurements that deliver the right amount of stretch to the cable when it’s hardened up would have been too tricky an exercise for me.

Hugh’s staysail is an upwind sail and relatively small, so the wind-up furling drum works.
Furling and unfurling
When the sail is hoisted for the first time, it will be unfurled, so this is best done on a nice day with little wind. Attach the head of the sail to the top swivel and the tack to the furling sheave. Tie on at least one sheet to keep the whole thing from flapping like a flag. Haul up the sail, set the halyard to the tension that suits the “twistiness” of the cable, and then roll up the sail.
With a more twisty cable, it can take quite a few turns of the furling sheave before the top starts turning. A bunch of torque builds up in the cable and it has to be released at some time, either when the sail is being rolled up or after it is furled.
Once the sail is furled, it’s good practice to uncleat the furling line and ease out a bit of line to let the furling sheave unwind, taking the excess torque out of the cable. Failing to do this could result in the sail becoming a pretzel when it’s lowered, and that will make relaunching and unfurling it very difficult.
The firmer the cable, the less this is a consideration. I have a very firm cable, and the only time I have to worry about stored torque in the line is when my top swivel binds.

The sail furls around its luff. At the head, Hugh uses an Amsteel pendant. The staysail gives Hagar a versatile double-headsail rig.
The magic
The magic started for me when I’d practiced enough with my top-down furler to get the hang of it and become comfortable sailing with it when shorthanded. I have had my furled gennaker up double-handed with a rookie crew on board who only had one week of adult sailing instruction. I had a few epic fails while I was learning, but they made for great conversation with my sailing friends.
I hoist my gennaker at the dock “all rolled up” and take it down at the dock when I return. When rolling it up, I find that continuing to roll up the sheets around the bottom of the furled sail keeps everything tight and lets me sail upwind in a breeze without any part of the furled sail flapping.
My top-down roller furler was such a delight that I bought a staysail furler as well. I put a used genoa staysail on the new rig that I can use in heavy weather instead of a Solent rig. This new furling staysail will also come in very handy for reaching, flown under- neath my genoa or my asymmetric spinnaker.
Installing a furler is a bit of work, whether it’s a headstay furler or a flying- sail furler. If my experience is anything to go by, the benefits are definitely worth the effort.
In Part 2 of this article, which will appear in the March issue, Hugh Johnston will provide some pointers on setting, using, and dousing the gennaker on its top-down furler.
Makers of Flying-Sail Furlers
Several brands of flying-sail furler, bottom-up and top-down, are available, most of them through marine retailers, sailmakers, and rigging shops.
- Bamar: bamarusa.com
- Colligo Marine: colligomarine.com
- Facnor: facnor.com
- Harken: harken.com
- Karver: karver-systems.com/en
- Profurl: profurl.com/english.html
- Ronstan: ronstan.com
- Seldén: seldenmast.com
Top-Down Advice –Editors
At the Annapolis sailboat show last October we had the opportu- nity to talk to several vendors of furlers, top-down and bottom-up. Display models had furlers fitted with miniature sails, which allow the whole setup to be studied and operated without the need to peer up the mast through binoculars.
While noting differences between their own products and those of the competition, each vendor was quite clear on one aspect of the top-down furler especially: precise measurement is critical for getting the best performance out of the torque cable and the sail.The two are only connected to each other at the top swivel, so the luff of the sail must be the right length, and the torque cable, once tensioned correctly, must also be of the right length.
A sailor confident in his or her rigging skills could emulate Hugh Johnston by starting with the cable a little long and adjusting downward.The more timid can benefit from engaging the help of the sailmaker, who will have experience in setting up these furlers as well as a vested interest in getting it right.

On Del Viento, the flying-sail furler attaches to a stainless steel bail welded between the anchor rollers.
Del Viento Meets the Code Zero –Michael Robertson
When we ordered a Code Zero sail and a Facnor FX 2500 flying-sail furling system for light-air upwind work, the sailmaker requested a luff measurement. “Haul a tape up to the masthead on your spinnaker halyard and then hold it taut at the point on the bow where you plan to attach the furling drum.That’s the dimension I need.”
I didn’t know where I’d attach the drum. My cruising boat’s bow looked crowded with pulpit rails, two large anchor rollers, and a headstay with a big conventional furling system. But I hauled the tape and pulled it taut, searching for a good spot that would be well forward of the headstay, clear all the obstacles, and leave room for the drum and furling line.The tape passed through the pulpit and landed square between the anchor rollers. It was perfect, but there was no place to attach a drum.
No matter. I measured the spot exactly where I wanted the drum to attach, a few inches above the tops of the rollers. Then I had a welder attach a simple robust arch between the anchor rollers (mimicking the existing bails) and include an eye for attaching a shackle from the base of the drum.
We’ve been using this setup for a few years now, no hitches. When we want to fly this sail, I drag the bag forward, attach the halyard to the top swivel, and raise the furled sail out of the bag, like a snake charmer. When the drum emerges, I connect it, tighten and make fast the halyard, run the furling line aft, and we’re ready to unfurl.


