Spring is here and marinas will soon be filled with mast-raisers. And while the world is filled (to the brim?) with mast-raising solutions, I have another. I believe my method is possibly the simplest solution most applicable to a wide range of boats. It allows a sailor to raise a mast independently, without a crane, affording freedom. It also enables a sailor to do it by themself. And while most mast-raising solutions require various panoply of items a sailor needs to either purchase or fabricate—various gin poles, A-frames, lifting poles, winches, 2×6 boards, lawn-mower wheels, and mast supports mounted to rudder fittings on the transom—and while sailors who trailer their boats to various waters have to carry all of that with them, the solution I’ve come up with uses a very small amount of extra equipment, so small it can almost be carried in one’s pocket.

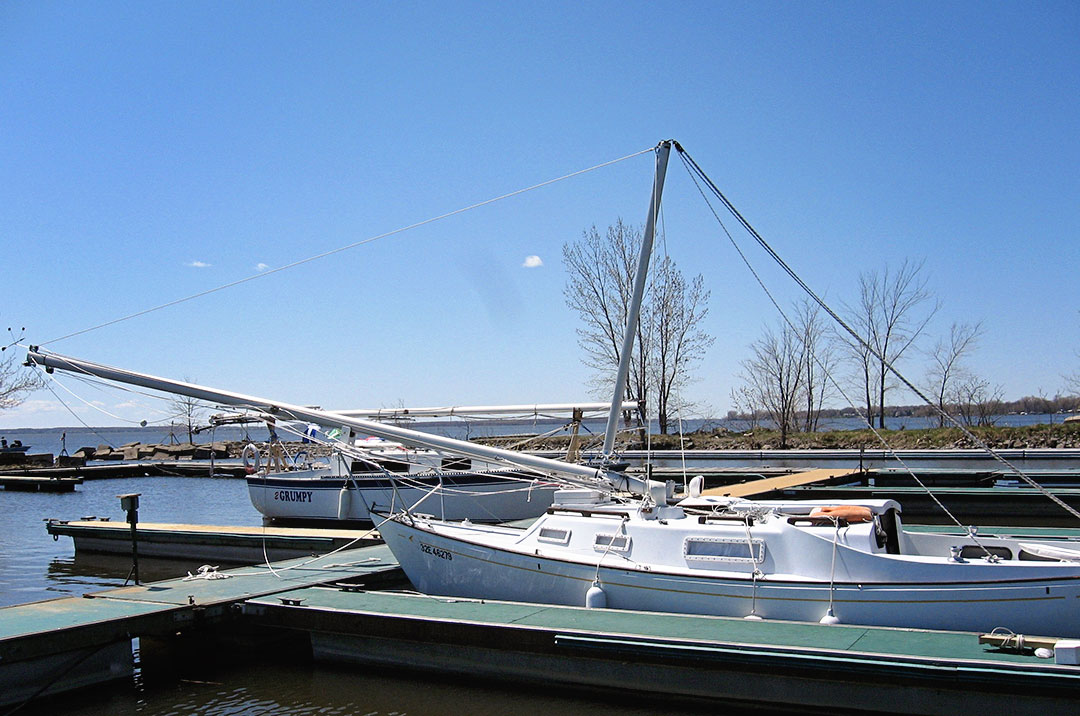
Everything rigged and mast ready to be raised with a tug on the mainsheet.
So, what is required and how do you rig it?
- First, to use my solution, your mast should have a mast base/step or tabernacle on which the mast can pivot. This is common.
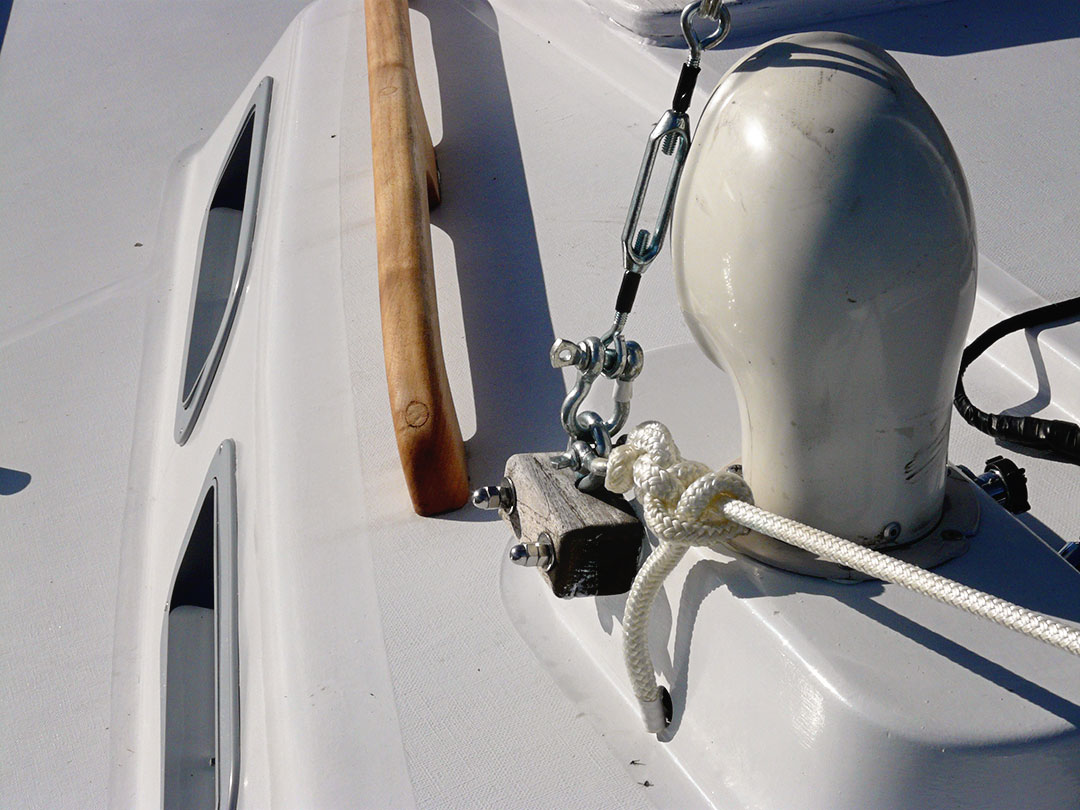
- Next, there will need to be an attachment point on either side of the boat, aligned with the mast pivoting point—athwartships and on the same axis. You might need to get creative here because each boat is different. The two attachment points (eyes are fine) can be permanent (as in this photo), or they can be made using a steel ring and two short lengths of steel wire or chain temporarily attached to an existing hardpoint. The wider these attachment points are spaced, the better, because they serve as hardpoints to attach two sets of temporary shrouds.
- About seven feet above the mast step (or as high as you can comfortably reach up the mast when it’s vertical) on either side of the mast, there must be tangs or permanent mounts to attach the mast-supporting set of temporary shrouds. I used a length of ¼-inch threaded rod that passes through the mast and through two small hardwood blocks and two small tangs made from mild steel. I install these tangs when needed, using wingnuts. When sailing, there is nothing on the mast to snag halyards, and the two small holes are not something I worry about.
And that is it for boat modifications.

Mast successfully raised, note the athwartships attachment points on the dorade boxes and the two sets of temporary shrouds.

A close-up view of the athwartships attachment points.
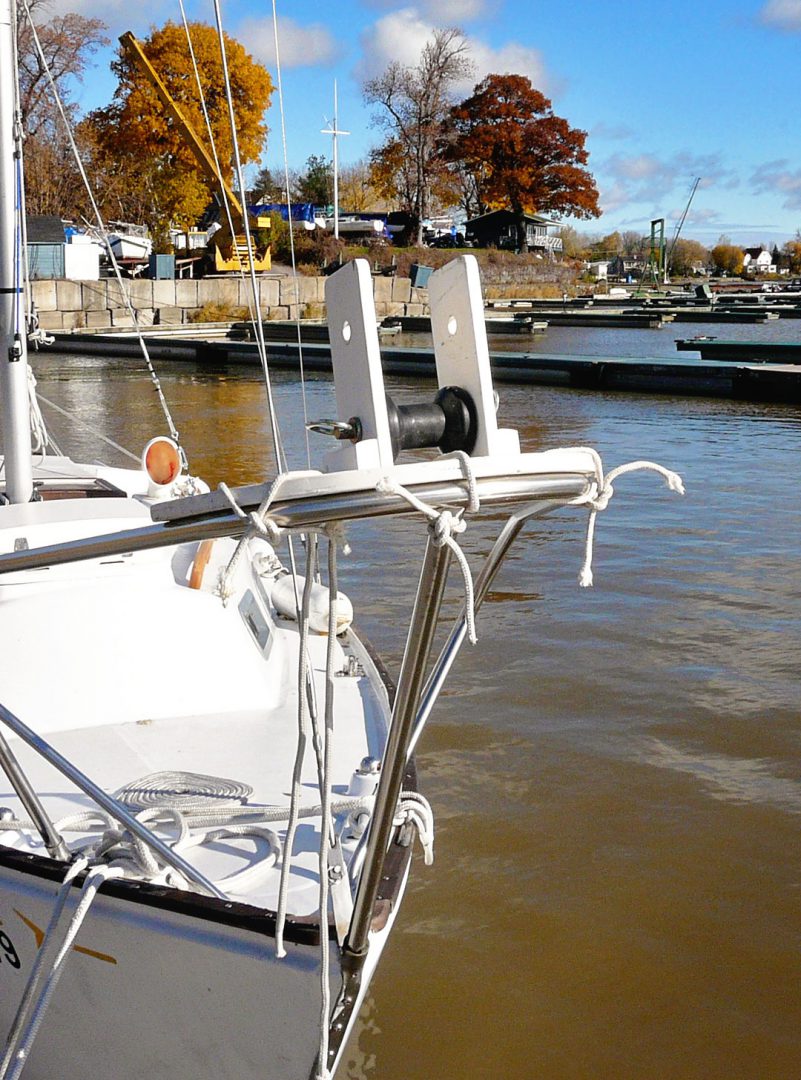
To raise and lower the mast, I rig things and operate as follows. In this example, the mast is attached to a pivoting base and stowed lowered onto the bow pulpit.
- Between the athwartships attachment points and the mast tangs, I attach a set of temporary shrouds. These I made from coated wire rope (the same as used for lifelines). These will remain taut for the duration of the mast raising or lowering (because they’re attached on the same axis on which the mast pivots) and serve to prevent the mast from swaying from side to side.
- I attach the boom like I’m ready to sail, 90 degrees to the mast, connected to the gooseneck fitting and with the topping lift and end-of-boom mainsheet rigged. I use the main halyard and boom downhaul to keep the gooseneck fixed (so it cannot slide up or down, if track-mounted).
- Between the athwartships attachment points and the clew end of the boom, I attach a second set of temporary shrouds. These I made from low-stretch braided line and they will also remain taut for the entire mast raising and lowering.
- Once all set, I pull on the mainsheet (rigged with 4:1 block-and-tackle for purchase) to raise the mast. It’s relatively easy and the mast remains in control; I can stop and start at any point in the process if needed.
If my mast was instead pivoted aft and stowed on an aft-rail support, I could still use the same method, but I would have to attach a separate gooseneck fitting on the front of the mast and some separate running rigging to function as the topping lift does.
Happy spring mast raising!

One nice-to-have modification I’ve made is to the pulpit where my mast rests when stowed. I made a wooden mast support mounted on the bow rail. The rubber roller has two positions: the lower position is used for winter mast storage, and the upper position allows for easy mast sliding, fore and aft, when getting it to the exact position in order to install (remove) the pivoting bolt/pin at the mast base or tabernacle. When not in use, I stow this support at the bottom of a sail locker.


