
“So, yeah, I think we should use Bondo.” Jeremy looked up from where he was inspecting the bulkhead.
I stared at him. “Bondo? Like the stuff Danny DeVito’s character in Matilda used when he wanted to cover up massive defects in junker cars long enough to sell them at a huge markup? Why would we want that on our boat?”
It turns out, there are lots of reasons to use a product like Bondo on a boat. Specific reasons at specific times, that is. Here follows the why, when, and how of using Bondo.
Bondo is actually a brand name for a 3M version of automotive putty. It’s a two-part product (like many marine epoxy systems) 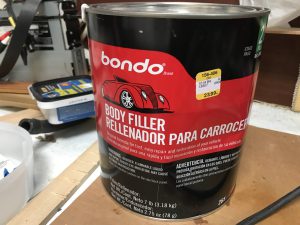 made of talc and plastic (unlike many marine epoxy systems), and it was invented to effect large repairs on car parts before painting. There are lots of generic auto putties on the market; we chose to use name-brand Bondo for our projects probably because that’s what we were familiar with.
We had two projects in mind when this conversation came up, both in the main salon area of our 1976 Bristol Channel Cutter, Calypso. We were doing a full major refit of the boat, which we have owned since 1992, much of which involves ripping out existing cabinetry and prepping the hull for the new stuff. When we pulled the finish (2-inch wide tongue and groove cedar strips) off of the main bulkhead, the glue was so tenacious it took the finish off of the plywood, exposing chasms and splintery strands. It needed to be sanded, yes, but also smoothed out for whatever our new finish will be.
The other head scratcher was how to deal with a V-shaped channel formed where the hull meets the teak floor. It’s at the inboard end of the storage space under the settee and seems to be screaming out to be filled with water or anything gross that will inevitably rupture and spill at some point while underway. It would be better to have that liquid spill out and go directly to the bilge, not sitting and festering and causing rot or blistering.
There are, of course, marine-specific products we could use. West System epoxy, thickened in various ways, comes to mind. Why, then, use Bondo?
Price: Bondo is far cheaper to use. We purchased a gallon of the stuff for $30; we’ve used almost all of it in our quest for smooth. Similar amounts of West System (and fillers) would be closer to $100.
Sanding: Bondo is way easier to sand smooth. Yes, it still takes a palm sander (or disc grinder) and some elbow grease, but it’s a quick project, unlike the West System. (Maybe they put diamond dust in that stuff. It explains both the price AND the durability!)
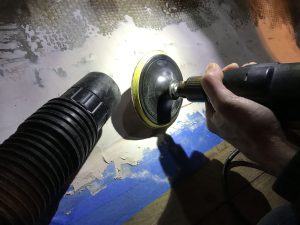
Disc grinding hardened Bondo.
I started the discussion making clear that our Bondo-focused projects were all interior. The other point to make is that none of the projects were structural in nature. Bondo dries hard, sands smooth, and holds paint well, but it doesn’t provide strength or structure. This matters. We happily used Bondo to smooth the surface of a bulkhead; we’d not create a bulkhead out of the stuff. At the same time, Bondo is not meant for application below the waterline or to seal water out.
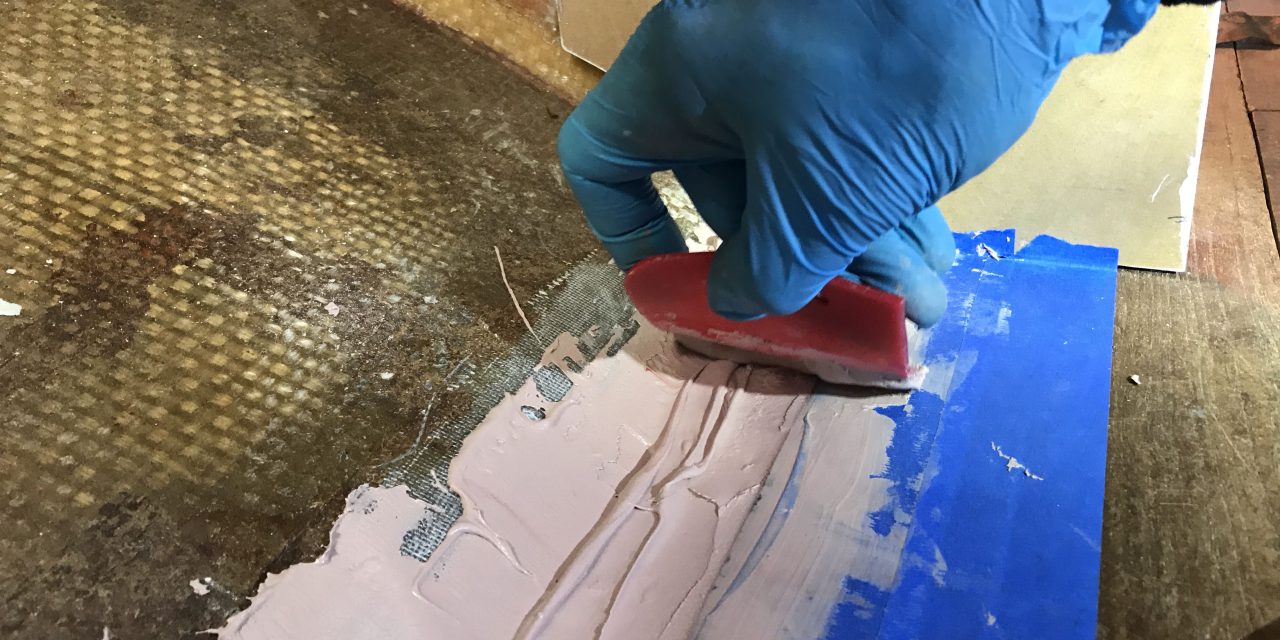
Once you’ve decided that yes, Bondo is for you, there are a few steps to keep in mind. The surface you’re applying it to needs to be relatively free of grease and dust, and it’s ideally applied in temperatures over 50 degrees. The stuff reeks, so respiratory protection is highly advised; if you can apply with hatches open and a fan going, so much the better. In any case, plan on applying and escaping. The container claims you can sand within 20 minutes but we let each application dry overnight before coming back for a repeat performance.
Helpful hints:
Tools: blue tape, sturdy paper plates, gloves for your hands, at least 2 SEPARATE stir sticks (the kind you get at a regular paint store), a measuring tape and sharpie, and a plastic spreader/squeegee tool.
Mask any area you don’t want to get Bondo on. It won’t completely limit the creep, but it helps a lot.
Mix little amounts more often rather than a huge amount all at once. Bondo kicks off fairly fast, and it’s way easier to work with when it’s flowing relatively easily.
Keep the stir stick you use to glop out the resin far away from the hardener. This way you can reuse the stick when you need to grab more resin.
Use the squeegee to press the Bondo into whatever surface you’re dealing with and smooth as much as possible.
It’s easier to smooth the Bondo when it’s wet than to have to sand it smooth. Do your best.
We found it easy to measure a 3-inch line of hardener onto a paper plate, then goop on the resin and mix thoroughly on the plate.
Bondo sands white, making it easy to visually see where you’ve sanded hard. We tend to judge smoothness by touching it, but this visual cue might help others.
Having a shop vac handy when you’re sanding keeps dust down.
Bondo isn’t what might immediately come to mind when you’re thinking about boat projects, but it definitely has its place. A smooth bulkhead and chasm-free storage area later, our sanding arms and budget are both happy!

