

 Safety and comfort increase with a companionway fix
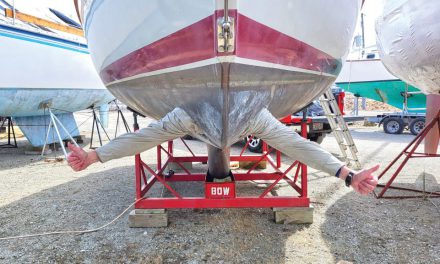
Sailboat designers have good knees. I know this because I’ve owned three sailboats with companionway step heights twice as high as the building-code-specified 7½ inches. My Stiletto 27 had a 21-inch-high step and my Corsair F-24 has a 19-inch step. Even my PDQ 32 cruising cat had 16-inch steps to climb to reach the cockpit, something my aging parents, my wife’s artificial knee, and I struggled with. In the case of each boat, there was room for designers to accommodate proper ergonomics, they just didn’t do it.
Beyond my three examples, I’ve found that aboard many smaller boats, crews are supposed to grab the edges of the companionway and muscle their way up and down, I suppose. Depending on sea and knee conditions, this ranges between uncomfortable and unsafe.
A tested, effective, and simple solution is to lay one or more planks, across the cabin at the correct height, in fitted cleats. These steps are light and easily removed for under-companionway access. The Stiletto 27 came from the factory with a single step built this way (and conveniently, it serves also as a bench seat). Unfortunately, the drop into the cabin was nearly 40 inches, making for two very long strides across the single step. To this boat I added two additional, like steps, creating a set of stairs that was easy to navigate and easily set aside for access to the aft-storage area.
This seemed like the best solution for my Corsair F-24 as well. Because the total drop was 19 inches, I needed to add only a single step.

Drew made the step cleats from oak pieces, shaped to fit the cross-section of a salvaged dinghy seat.
I started by considering what I had on-hand: a surplus foam-and-fiberglass inflatable dinghy seat (alternatively, I could have used a ¾- x 8-inch board, as I have on other boats). Cutting the molded ends off the seat allowed me to see the cross section of the seat, and the shape that cleats would need to accommodate.
With this knowledge, I cut cleats from 2- x 2-inch hard- wood blocks on a table saw. I cut the rabbet (a notch or groove) in two passes, being sure to leave more than half of the material below the deepest groove to ensure strength and room for bolts. When finished, I glued 1⁄4-inch endplates to the backs using thickened epoxy and then trimmed them to shape with a disk sander.

G/flex epoxy is semi-flexible when cured, an important property in this application, as the bulkheads may give a bit.
I mounted each cleat differently because the port and starboard bulkheads I had to work with were very different. To port was a thin hull liner, to the back of which I epoxy-bonded a 3⁄16-inch-thick fiberglass backing plate, about 1-inch larger in both dimensions than the cleat. Then I epoxy-bonded the cleat to the liner and fastened the whole sandwich together using 21⁄4-inch bolts.

Drew thickened the epoxy with colloidal silica before applying to the backs of the cleats. He made sure the epoxy was thick enough to fill gaps and thin enough to penetrate. Another approach would have been to paint the surfaces with un-thickened epoxy, then thicken and apply the bedding coat.
The starboard side was more complicated because the carpeted bulkhead is one side of a balsa-cored centerboard case (and there is water on the other side of it). Here, I cut away a cleat-sized rectangle of the carpet and removed the crumbly old glue and prepped the fiberglass surface with a cup brush on a drill and a multitool with 80-grit sandpaper. To mount the cleat, I epoxy-bonded it and used wood screws (just long enough to bite into the first layer of fiberglass, but not penetrate the inner skin) to apply light clamping pressure. These screws will never carry the load, but in addition to providing clamping pressure while the epoxy sets, they provide visual symmetry with the port-side cleat.

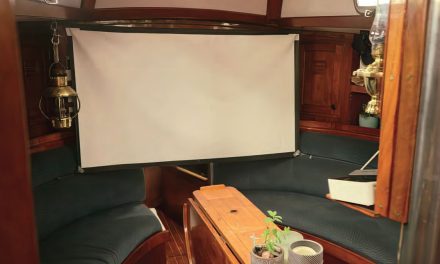
Finished cleats installed and ready for the step.
In all cases, I used West System’s G/flex epoxy blended with colloidal silica. I ensured that it was thin enough to penetrate and wet, but not so thin that it ran. G/flex is not as strong as regular epoxies, but it bonds better to plastics and imperfectly prepared surfaces, and it better tolerates the small amount of flexing I expected from the thin hull liner (even with the backing plate).
The last step was to cut the surplus dinghy seat to the right size. I cut it about 1⁄8-inch shorter than the actual span to prevent jamming and allow for hull movement. Then I dug out 3⁄16-inch of foam from each end and filled with thickened epoxy to finish them.

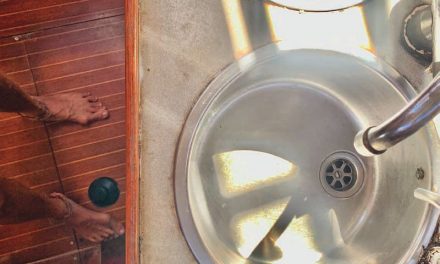
Project complete: a factory-finish-looking step where one was sorely needed.
The result is a rugged factory-looking step that is easy on the knees and simple to remove. Total cost of the project? It was all scraps, but $20 should cover it if you have the paint and glue on hand.
