
Cover Photos
High-quality photographs are an indispensable part of Good Old Boat magazine and essential for every issue’s effectiveness to show nautical locales, sailboats, and projects. Without your photos, we couldn’t share all the valuable information “the rest of us” need to improve and enhance our good old boats. Pay attention to these factors when submitting artwork for consideration.
Audience
- Good Old Boat inspires hands-on sailors through informed technical articles and compelling sailing stories. Its readers are passionate and eager to try new ideas. Choose photos that embody these points to effectively capture what makes a good old boat.
- Hands-on sailors are our jam! Images that feature people aboard are particularly appealing. Send us boaters engaged in maintenance or DIY projects, actively sailing, or just having fun on board.
- Be imaginative: think outside the nautical box and beyond that classic image of a boat underway with the sails trimmed. Our covers from recent years are good models for the kind of imagery we’re into, and include everything from shipyard aerial views to boat dogs and artistic views of hardware.
- Photos taken in North America are preferred.
- Check back issues of Good Old Boat for examples of good photographs.
Technical
- Choose an extra-large, hi-resolution file: at least 2700 x 3600 pixels or 9 x 12 inches at 300 ppi
- Cover image submissions must be vertical format to match the cover page dimensions.
- Submit your photos in JPG or TIF format
- Please do not submit monochrome or heavily edited images for cover page consideration
Tips
- Keep your horizons level and bulkheads upright. Many cameras have an option to show gridlines on the screen, use these to ensure your shots are level.
- Make sure your subject is isolated from the background. Reduce visual clutter by choosing clean and simple backgrounds and checking all four corners of the image for distractions.
- When possible, shoot in conditions with less harsh lighting. When inside, use indirect light to feature your subject. When outside, wait for a slightly overcast day or position your subject in the shade.
Submissions
- Use your name and “GOBcover” in the photo file name(s), e.g. GOBcover_Smith1.jpg, GOBcover_Smith2.jpg, GOBcover_Smith3.jpg
- Include captions to match each file name. Tell us a little about the photo, what was happening, and where you were at the time.
- You may submit cover photo options to Scott Racette – Please include the words “Cover Photo Submission” in the subject line of your email.
Images for Stories
- Photos should be in JPG or TIFF format and at least 1200 pixels wide or 240 DPI.
- Please provide photos without dramatic post-processing work, sharpening, HDR effects, or black-and-white or sepia coloring (unless they are scanned film photos).
- DO NOT embed photos or captions in a Word doc. Please submit your photos and words in separate files.
- Please name photos using your surname (e.g., Smith1, Smith2, etc.) That tells our editors and our designer which photos go with which story and helps to avoid confusion.
- Provide a brief description telling readers what’s going on in the photo, and if applicable, where it was taken. If possible, write a caption that is a complete sentence, in present tense (we realize this isn’t always possible). Examples:
-
- Yahtzee has Gedney Harbor all to herself.
- Exilés sails toward Point Claire Yacht Club.
- The bridge deck is clean and clear after Lee removed the old traveler.
- Vivian works to replace the interior headliners on Ultima.
Contact: Editor, Andy Cross if you have any questions.
Photography Examples for when Submitting Articles
The goal of this photo is to show the Main Cabin for a refit boat article. The lighting was predominantly dark with a few bright shafts of sunlight.
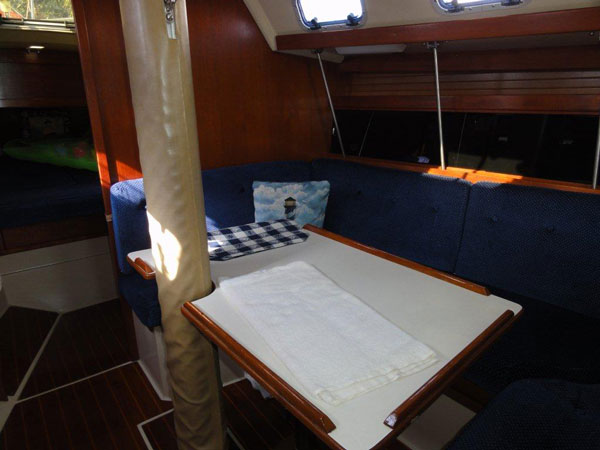

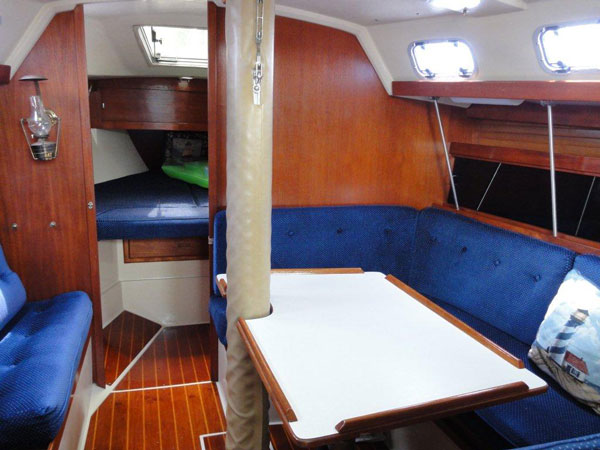
Photo 1 – Using a flash in an area as large as a cabin didn’t provide enough light.
Photo 2 – We held the camera very steady and used only available light.
Photo 3 – We slightly changed the viewpoint, removed the clutter, and waited for a passing cloud to mute the bright sunlight.
Later we realized it would have been better to remove the green float from the V-berth rather than shoving it in corner!
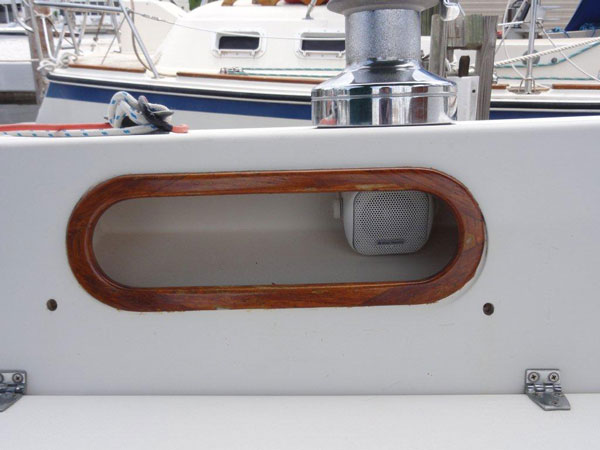
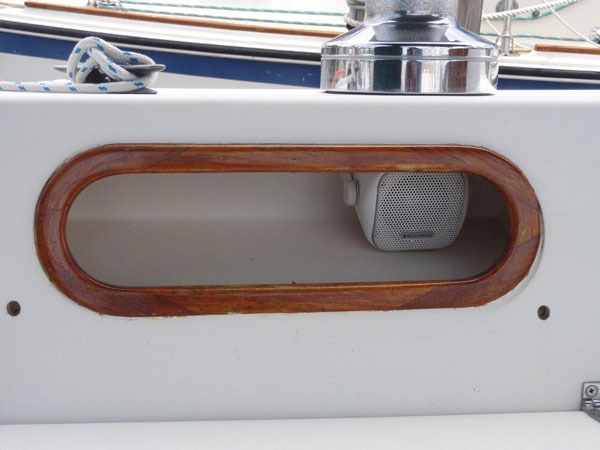
Photo 1 – The first shot shows a busy background and bright orange extension cord that distract from the main speaker in the pocket.
Photo 2 – We shifted our angle slightly and moved the extension cord. We should have removed cord entirely so it didn’t show as a reflection in the winch.
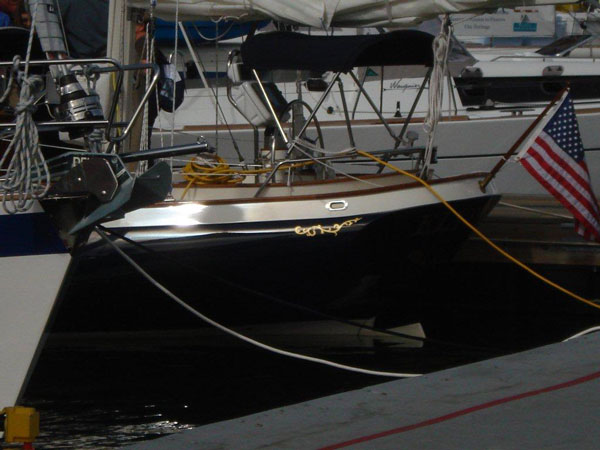
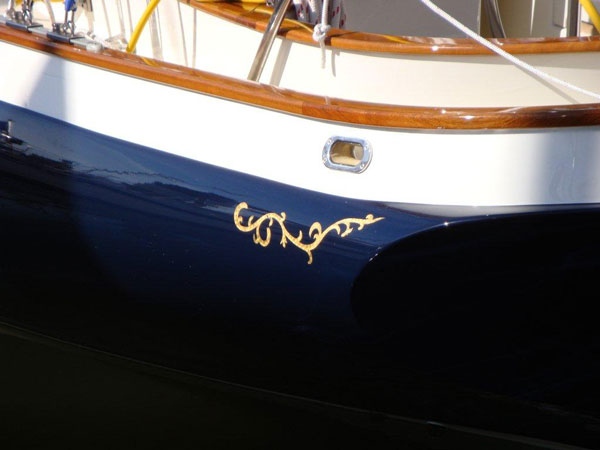

Photo 2 – We shifted our viewpoint to minimize glare.
Photo 3 – We found another cove stripe in the shade. The lighting for this one showed the shape and depth very well.
The goal of this photo is to show the Winch & Cleat arrangement on deck.
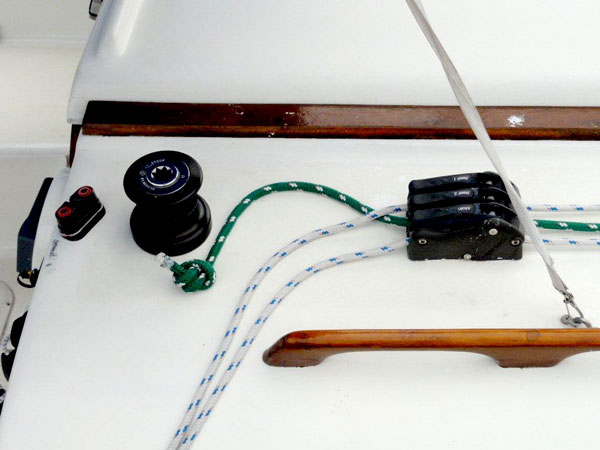
Photo 1 – This shot of the lines with diffused light created a neat and uncluttered photo.
Removing the Bimini strap and white splatter would have made it even better.
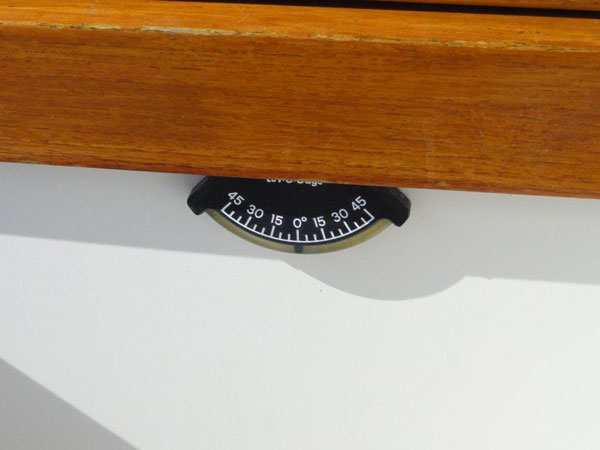
Photo 2 – The soft (diffused) light in the second photo helps focus attention on the subject.
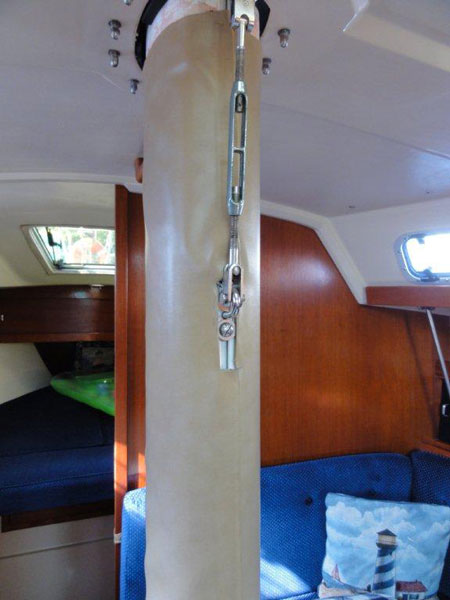
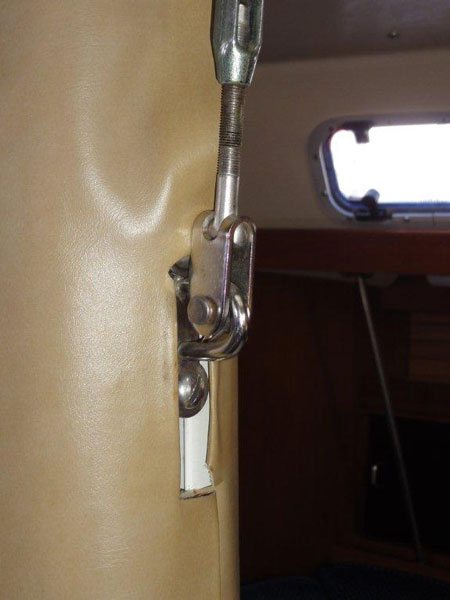
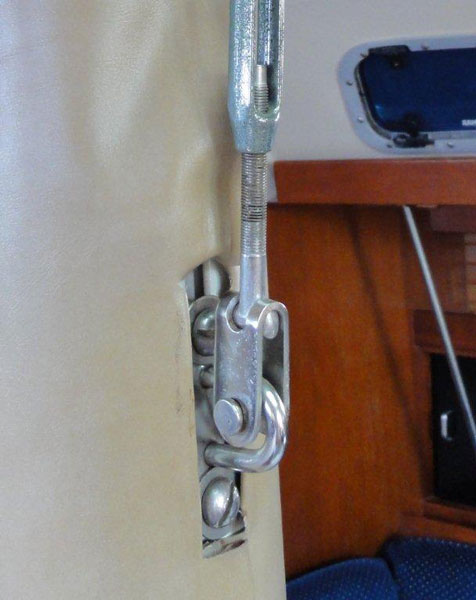
Photo 2 – This close up is better but now the flash created glare.
Photo 3 – Now our overall light is good, but the angle is bad with a bright port as background (no flash).
Photo 4 – After covering the port, we have good lighting and view (no flash).
The goal of this photo is to show the Navigation and Electronics Panels in the nav station.
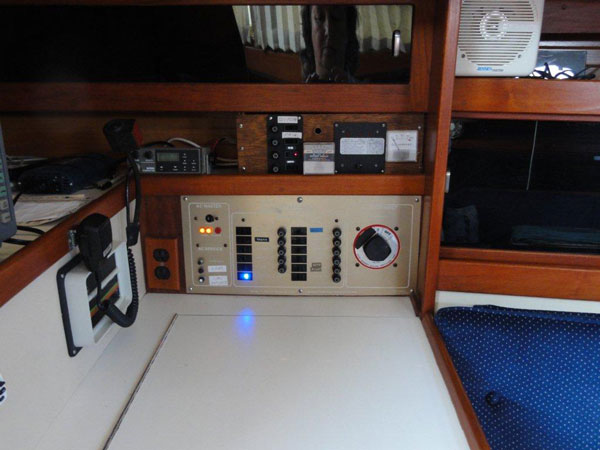
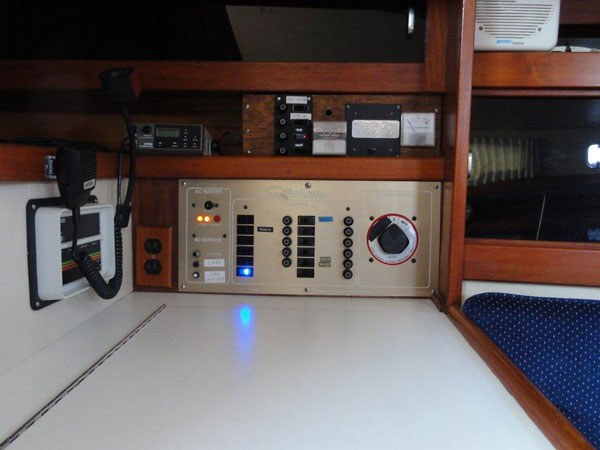
Photo 1 – We noticed that the clutter and reflections in sliding door are distracting.
Photo 2 – A slight change in angle improved the photo, but providing a bit more light to the upper left corner would have been better still.
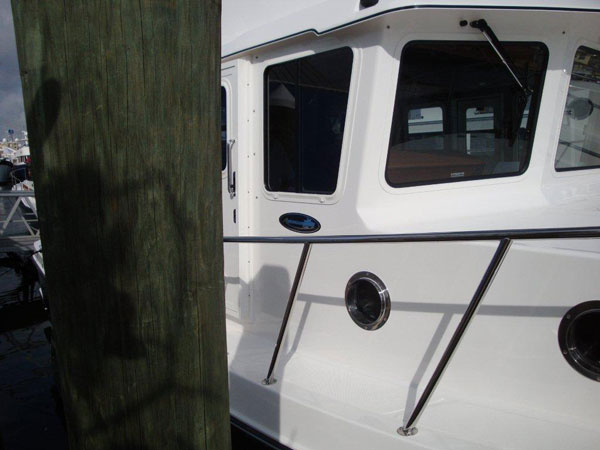
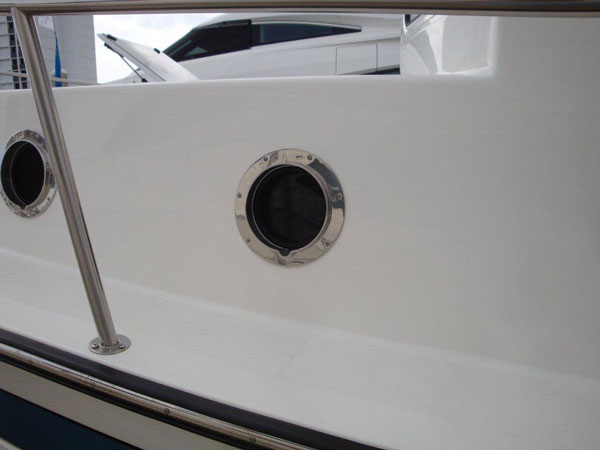
Photo 2 – But taking the photo from the other side of the boat worked out perfectly.
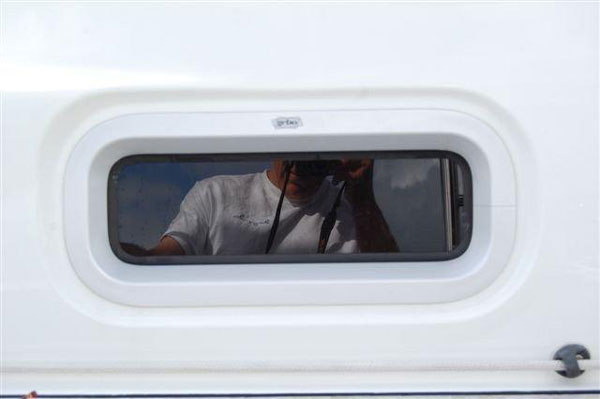
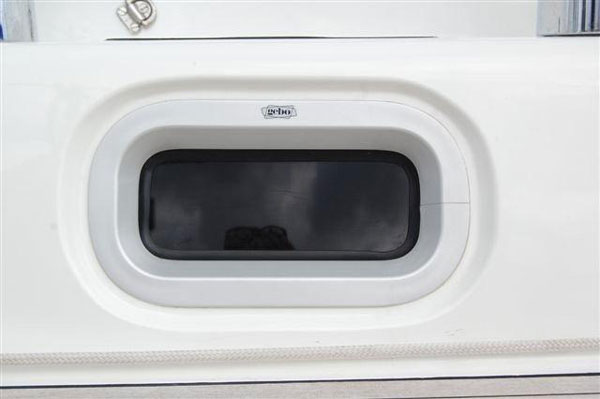
Photo 2 – We waited for a cloud and shifted our angle to improve the image.

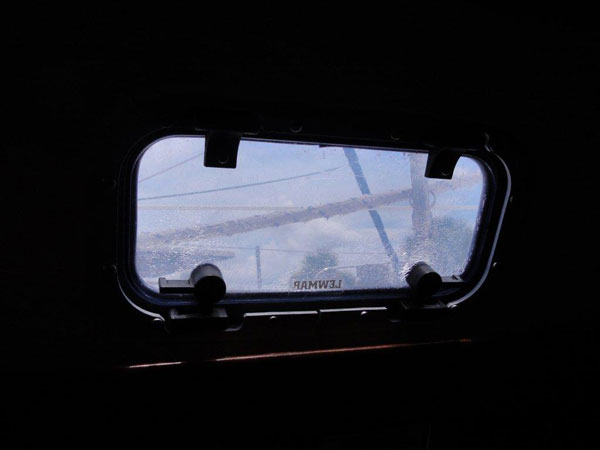
Photo 1 – Using a flash shows the installation and liner clearly.
Photo 2 – Taking the shot without a flash shows the crazing of aging plastic.